
Software Developer, Cat Lover, Coffee Drinker, Video game enthusiast. I enjoy creating meaningful experiences through the apps I help build.
Updated Apr 12, 2023
BDD is designed to encourage collaboration between developers, business analysts, and other stakeholders by providing a common language to describe the system's behavior. It is a process centered around defining software behavior in a human-readable form: e.g. "Given-When-Then."
BDD can be used to define behavior-level automated testing. The same human-readable specifications used to capture stakeholder, business and product requirements can be used to create structured, automated testing. This is where Playwright and CucumberJS come in to play.
In this article we are going to walk through how to create a simple NextJS app, configure it to use BDD, Playwright and Cucumber and add some simple given-when-then tests.
You can follow along with the source code here: getting-started-with-bdd@Github
Let’s start with a very basic create-next-app project. We will be using NextJS, and Typescript. For this example we are going to build the following, very basic UI:

The code for our very simple counter app will live in src/pages/index.tsx :
import { useState } from "react";

export default function HomePage() {
  const [count, setCount] = useState(0)

  let incrementCount = () => {
    setCount(count + 1)
  }

  let decrementCount = () => {
    if (count === 0) return
    setCount(count - 1)
  }

  return (
    <div className="app">
      <div>
        <div className="count">
          <h1 data-testid="counter-text">Count: {count}</h1>
        </div>
        <div className="buttons">
          <button data-testid="decrease" title={"-"} onClick={decrementCount}>-</button>
          <button data-testid="increase" title={"+"} onClick={incrementCount}>+</button>
        </div>
      </div>
    </div>
  )
}Next we need to install Playwright, an open-source NodeJS framework for browser automation. To install it, run the following command: yarn create playwright
Now check that Playwright automatically added the following files and folders:
**playwright.config.ts
package.json
package-lock.json
tests/
  example.spec.ts
tests-examples/
  demo-todo-app.spec.ts**
As you can see playwright already created a couple of sample tests for us. We can check them out and run them by using the following command: npx playwright test
At this point we are ready to add our own tests using. We will focus on adding CucumberJS to do some Behavior Driven Development.
Just like Playwright all we need to do is run the following commands:
yarn add --dev @cucumber/cucumber
yarn add --dev @types/cucumber
yarn add --dev ts-node
Next we want to create a new file in the root folder of our project called cucumber.js. This will contain the following configuration:
const config = {
    paths: ['tests/acceptance/features/**/*.feature'],
    require: ['tests/acceptance/step_definitions/**/*.ts'],
    requireModule: ['ts-node/register'],
    format: [
      'summary',
      'progress-bar',
    ],
    formatOptions: { snippetInterface: 'async-await' },
    publishQuiet: true,
  };

module.exports = {
   default: config
 }
This configuration file consist on the following:
paths: ['tests/acceptance/features/**/*.feature'] indicates the folder where our .feature files will live.require: ['tests/acceptance/step_definitions/**/*.ts'] tells cucumber where to look for the steps.tsfiles that will contain the actual testing code.requireModule: ['ts-node/register'] adds Typescript support for CucumberJS.The base of a BDD implementation is usually the Feature file. These files provide a high-level description of a software feature and a group of related scenarios that test that feature. It is usually written in plain English and aimed to describe what the software should do in a non-technical way.
A Scenario is a list of steps that need to be followed in order to verify that a feature is working as intended, basically a Feature can have as many scenarios as needed to validate different cases within the same feature (per example a login with different providers and error states)
Finally a Scenario is built using different steps, that follows the Gherkin syntax. Each step should start with Given, When, Then, And, or But, followed by a short description.
As we previously defined in the cucumber.js file, our .feature files live under the tests/acceptance/features/folder, so we will create those folders. Next, we will create our first .feature file called: simple_counter.feature:
Feature: Simple counter
  User wants to use counter to increase or decrease the number on screen

  Scenario: Counter is increased
    Given User visits homepage
    When User clicks the + button
    Then User sees the counter get increased
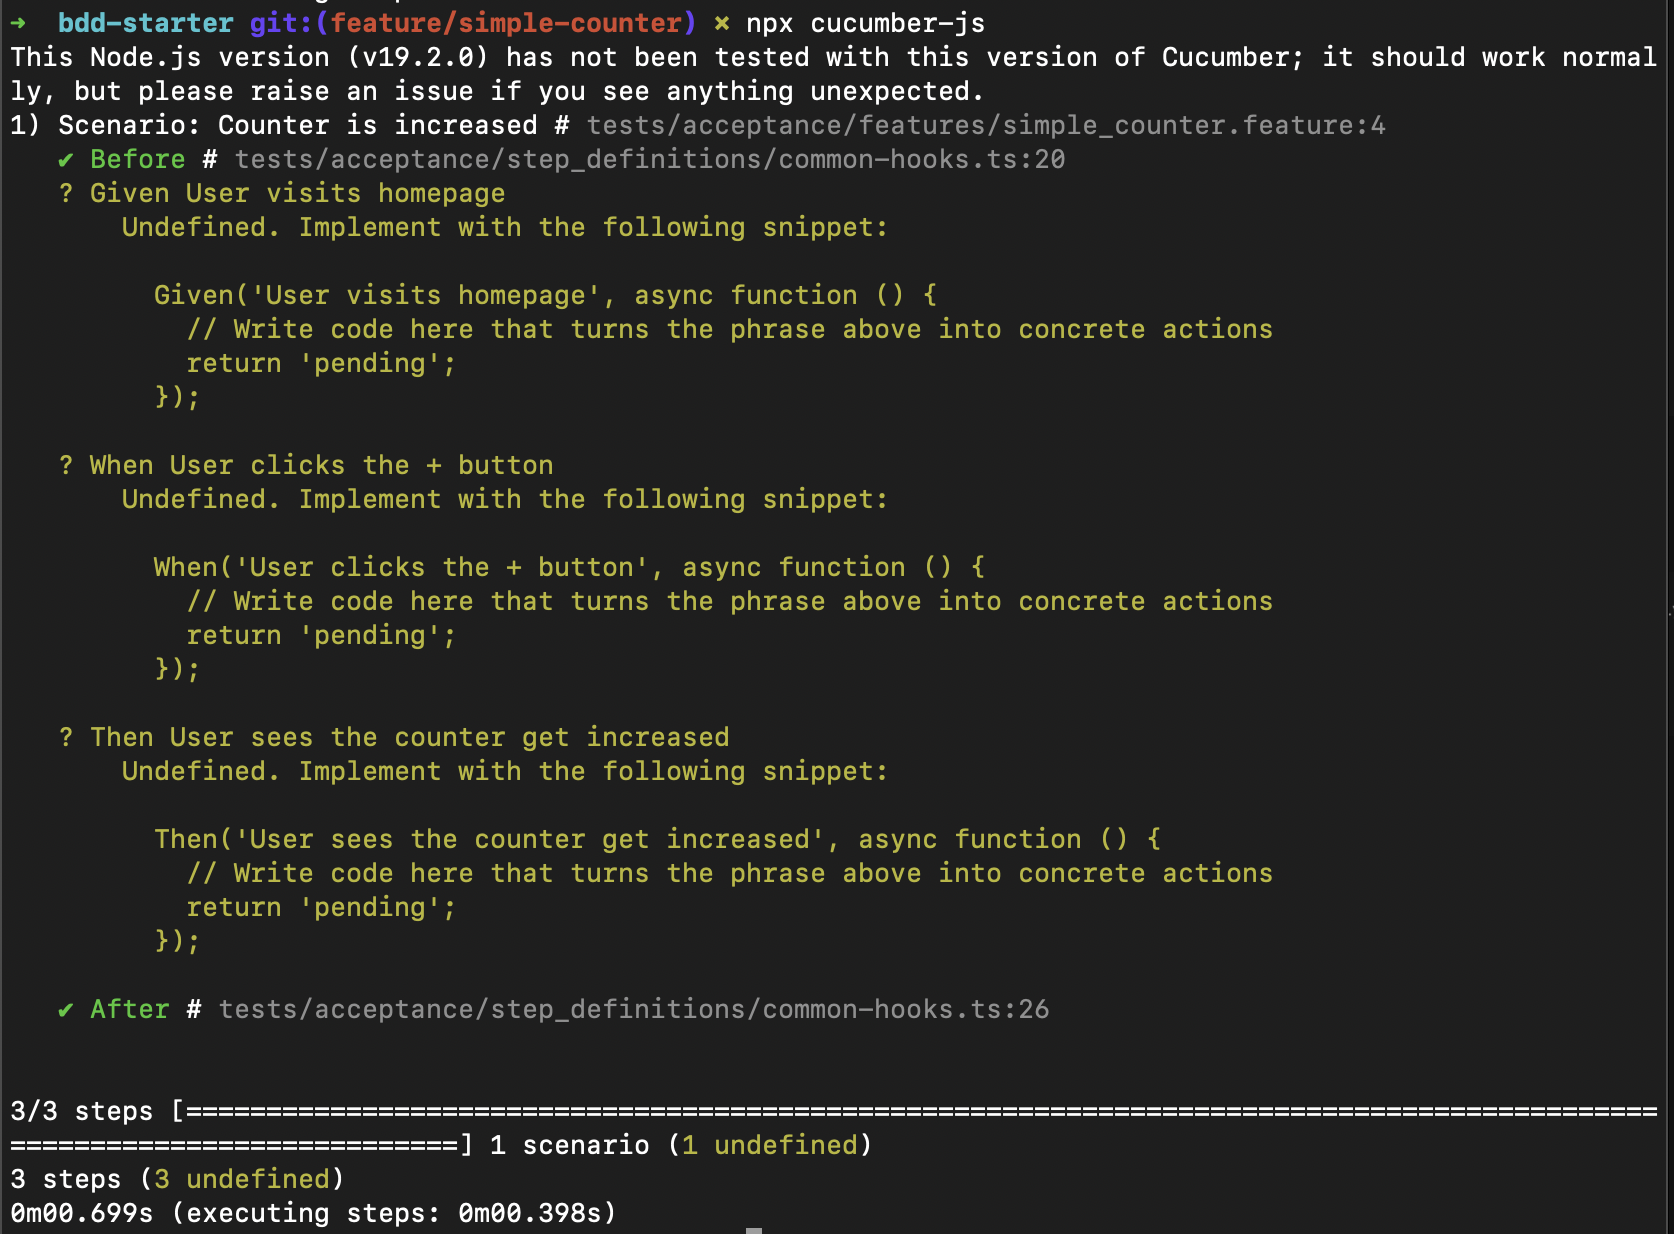
If we run npx cucumber-js we will be presented with the following output in the terminal, this means that cucumber has been successfully executed, but some steps have not been defined through code.
Before we create the actual code and the steps.ts file, we should create a world.ts file and a hooks.ts file. This will allow us to run code before each test and after each test as needed. It will also let us set up global, shared variables across the different steps of each scenario.
First we create custom-world.ts file inside of the tests/acceptance/step_definitions/ folder:
import { IWorldOptions, World, setWorldConstructor } from '@cucumber/cucumber'
import { BrowserContext, Page } from '@playwright/test'

export interface ICustomWorld extends World {
	context?: BrowserContext
	page?: Page
}

export class CustomWorld extends World implements ICustomWorld {
	constructor(options: IWorldOptions) {
		super(options)
	}
}

setWorldConstructor(CustomWorld)
Then we create a common-hooks.ts file inside of thetests/acceptance/step_definitions/ folder:
The common-hooks.ts file will allow us to create a new browser before each test, and will also allows us to store a reference to current browser context and current page. We'll need to access that context during our test steps. Finally, we'll close the browser once all tests have finished running.
import { ICustomWorld } from "./custom-world";
import {
	ChromiumBrowser,
	chromium
} from '@playwright/test'
import { After, AfterAll, Before, BeforeAll } from '@cucumber/cucumber'

let browser: ChromiumBrowser

BeforeAll(async function() {
    browser = await chromium.launch({ headless: false })
  });

Before(async function(this: ICustomWorld) {
  this.context = await browser.newContext()
  this.page = await this.context.newPage()
});

After(async function(this: ICustomWorld) {
  await this.page?.close()
  await this.context?.close()
});

AfterAll(async function() {
  await browser.close()
});
The last file wee need to create is the scenario file: simple_counter.steps.ts. Place that in the same tests/acceptance/step_definitions/folder. This file contains the code for the steps defined in the .feature file. Here we will use Playwright to manipulate our component in a live browser instance to validate the functionality we want to test.
import { Given, When, Then } from '@cucumber/cucumber'
import { expect } from '@playwright/test'
import { ICustomWorld } from './custom-world'

Given('User visits homepage', async function (this: ICustomWorld) {
    const page = this.page!
    await page.goto('localhost:3000')
})

When('User clicks the + button', async function (this: ICustomWorld) {
    const page = this.page!
    const plusButton = await page.locator('[data-testid="increase"]')
    await expect(plusButton).toBeVisible()
    await plusButton.click()
})

Then('User sees the counter get increased', async function (this: ICustomWorld) {
    const page = this.page!
    const counterText = await page.locator('[data-testid="counter-text"]')
    await expect(counterText).toHaveText('Count: 1')
  })
Once we finished adding the code to each of the steps in the .steps.ts file, we can run cucumber again by using the following command: npx cucumber-js. You may see a Typescript error at this point. We just left the tsconfig.json as it was originally created by NextJS, so let’s update the following values in our tsconfig.json:
"module": "CommonJS",
"target": "es6",
Our tsconfig.json It should now look like this:
{
  "compilerOptions": {
    "target": "es6",
    "lib": ["dom", "dom.iterable", "esnext"],
    "allowJs": true,
    "skipLibCheck": true,
    "strict": true,
    "forceConsistentCasingInFileNames": true,
    "noEmit": true,
    "esModuleInterop": true,
    "module": "CommonJS",
    "moduleResolution": "node",
    "resolveJsonModule": true,
    "isolatedModules": true,
    "jsx": "preserve",
    "incremental": true,
    "baseUrl": ".",
    "paths": {
      "@/*": ["./src/*"]
    }
  },
  "include": ["next-env.d.ts", "**/*.ts", "**/*.tsx"],
  "exclude": ["node_modules"]
}
Finally run the following command: npx cucumber-js

And voila, we have our first tests running and passing using Playwright and Cucumber!
With this setup you can easily keep adding more tests using Playwright and Cucumber. You can add as many scenarios as needed for each feature, and you can also have as many features as you need to validate the correct behavior of the product.
Also we can extend our current project with extra functionality like HTML Reporting and video, screenshot recording.
Can we help you apply these ideas on your project? Send us a message! You'll get to talk with our awesome delivery team on your very first call.
 Github
 LinkedIn